How To Install Our Rat Flap Valves
Our valves are very easy to install and DIY friendly minimal tools are required and the below installation guide will help you fit the valves in most types of sewers. If you have any problems with installation please contact and we will do our best to help!
Rat Barrier Installation Instructions
Installation Instructions for Ratbarrier, Sewerstore and Advanced Metal Works Rat Valves.
A PDF Version of our installation Manual is available here
Please phone 01793 630768 or email [email protected] if you require further advice on installation.
- Apply latex Gloves and eye protection to protect against splash back of sewage
- Locate and open manhole cover and identify direction of flow from the property by running taps and flushing toilets, non return valves should be fitted to every outlet from the property to ensure complete protection. Ensure outlets are suitable for the installation of the valves, if outlets are curved then modification may be required to allow room to install or use our Mini Valve version for curved outlets.
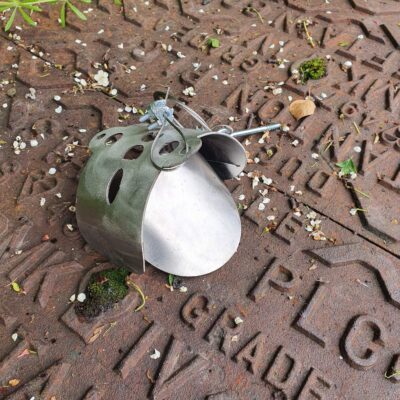
3. Extend the mounting pole if using for deep chambers (click to buy online) and attach the Rat Blocker before lowering it into the manhole. If installing in a reachable outlet no pole is required as the valve once compressed and inserted into the pipe will clamp against the chamber wall. The pole and fitting kit is only for deep chambers.
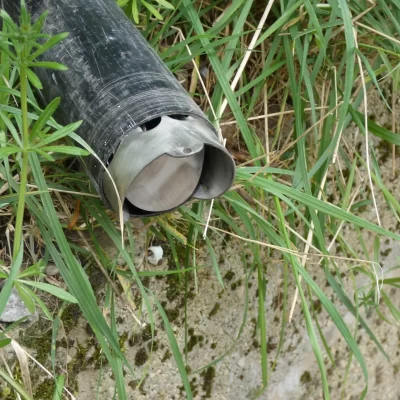
4. Clean all outlets and ensure they are free from dirt or debris.
5. Push Valve into outlet a rubber mallet maybe required to gently tap the metal body of the valve pushing it into the outlet.

6. Ensure flap operation is correct by running the water through the pipe by flushing the toilet or running taps.
7. Ensure hinge is aligned vertically and flap opens and closes without fouling.
8. If using the retaining cable drill hole approximately 5-10 inches above the valve into the wall of the chamber and push in the raw plug, screw in o ring screw and attach the cable (The cable prevents the valve from blocking the sewer if in the unlikely event it became loose)
9. Maintenance by inspection of the valve should be carried out once per year ensuring hinge is functioning correctly.rats chewing manhole lid
Removal Instructions
- Open manhole cover and identify valve for removal
- Apply latex gloves and eye protection to protect against splash back
- Remove retaining cable (if in use)
- Lift flap and expose valve body
- Using Pliers grip body of the valve and pull valve out, if valve is stuck using pliers move valve from side to side or up and down until it becomes free.
Correct Flap Direction
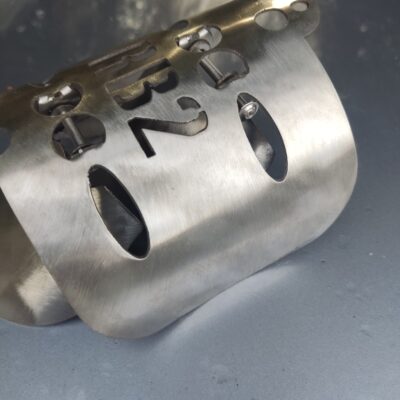
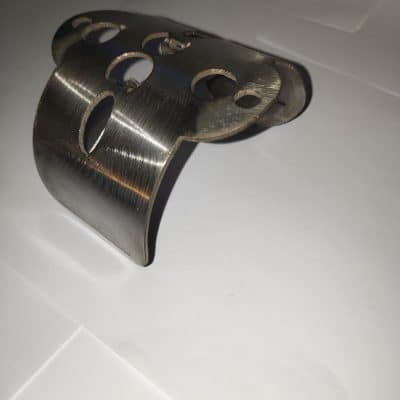
All models of the Sewerstore Rat Flap are supplied with reversible flaps so that the same unit can be used in either inlet or outlet pipes.
Check that the flaps are in the correct orientation before installing the unit. If the flaps are installed in the incorrect orientation this will result in blockage of the drain as the flaps will be prevented from opening. The following images show the correct orientation of the flaps for installation in inlets or outlets (flow direction is indicated by the smaller arrows).
Installation Using Our Installation Kit and Pole
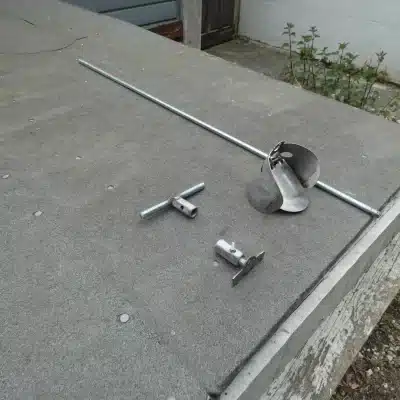
You should have the parts below including installation pole, valve, installation kit and nut and bolt for assembling the pole itself.

Connect the two rods togeather and line up the pole hole and the nut hole you should be able to see all the way through the hole in the nut when lined up. Add the nut and bolt to the hole and tighten.

Undo the nut from the fitting kit and push the threaded bolt part through the valve taking note of the notch whichshould be facing forwards the same as the main body.

Add the nut to the bolt and hand tighten but do not over tighten.

Connect the installation pole to the Installation Kit!

The Valve is now ready to be inserted into the opening. The valve can also be reversed and installed in the opposite direction. The valve should be able to be pushed into the hole and just about touching the sides if it is too big open the flap and compress the body making it smaller. Once in the opening turn the pole clockwise until the valve opens and compresses and secures against the wall of the chamber. Once secured you can turn the installation poles anti clockwise and unscrew. Removal of the valve is carried out by attaching the pole and pulling the valve out of the hole.
Make sure the flap is working by flushing toilet paper down the toilet and watching it exit the valve.

Attach the retaining cable to the valve and use the vine eye to fix within the chamber.
Shop Online
-

4 “/100 – 110mm Budget Rat Flap (Not Install Pole Compatible)
£27.00 -
4 “/100 – 110mm Mini Rat Flap
£32.00 -
4″ 100mm -110mm Dual Rat Flap Sewer Valve May Not Be Suitable For Sweeping Outlets
£45.00 -
4″ Mini Valve Spare Body Only (Bare Body Only)
£15.99 -
6″ 152mm Dual Rat Flap Sewer Valve May Not Be Suitable For Swept Outlets
£65.00 -
Fitting Kit for 1m extension pole fits all our 4″ and 6″ rat flaps
£5.99 -
Micro Drain Pipe Rat Flap for 68mm Pipes
£23.99 -
One Metre Extension Pole For RB2 RB4 RB6 All our 4″ and 6″ Valves
£15.00